

Key Takeaways
- Historic Louisville homes need a painting approach that considers original materials, architectural details, and past alterations.
- Research the home’s history and existing features before choosing exterior colors or finishes.
- Check local historic-district, preservation, or HOA requirements before changing visible exterior features.
- Inspect for moisture, rot, peeling paint, damaged wood, failing caulk, and other problems before painting.
- Homes built before 1978 may require lead-safe work practices when old coatings are disturbed.
- Match primers, paints, and preparation methods to the specific materials, including wood, masonry, metal, and plaster.
- Complete repairs and address moisture problems before applying new paint.
- Detailed estimates should separate preparation, repairs, materials, labor, and cleanup for easier comparison.
- Professional assistance can be useful when lead paint, difficult access, extensive deterioration, or historic requirements are involved.
A historic home deserves more than a quick color change. In Louisville, where older residences may feature original wood siding, detailed porch trim, masonry, and layered architectural character, paint is both a finishing touch and a protective system. A successful project begins by understanding the building, its materials, and the conditions that caused the old coating to fail. Homeowners researching can look to H.F. Steilberg Co. Inc., a historic house painting Louisville, KY, whose historic-house service focuses on the specialized preparation, color awareness, and painting methods older properties require. That focus is valuable for local homeowners because historic finishes, decorative woodwork, and long-standing materials need a more careful approach than a standard repaint.
Start With the Home’s Story
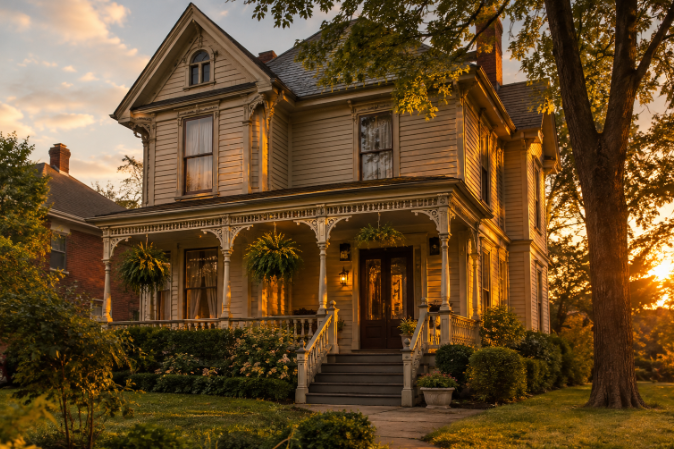
Paint can emphasize a Craftsman porch, define Victorian trim, unify an addition, and protect exposed wood from moisture. Before choosing a color card, identify what makes the home distinctive. Look at the original siding, shutters, doors, brackets, railings, masonry, and window surrounds. Note later changes, such as replacement windows, enclosed porches, or additions, so the new scheme feels intentional rather than disconnected. A house does not need formal landmark status to deserve thoughtful treatment. Age, original craftsmanship, and surviving materials are good reasons to slow down, document conditions, and make decisions that preserve character.
Research a Color Direction Before Buying Paint
The goal does not always have to be an exact restoration. Some owners want a historically accurate palette, while others prefer a period-inspired update that works with modern preferences. Either approach benefits from research.
- Review old family photographs, neighborhood archives, property records, and local history collections.
- Study similarly aged homes nearby for proportion and color relationships, without copying them exactly.
- Consider permanent elements, including brick, stone, roofing, walkways, and porch flooring.
- Test samples on several sides of the home, since daylight and shade can change how a color appears.
- Use body, trim, door, and accent colors to clarify architectural details instead of competing with them.
Historic paint research may reveal more than one earlier scheme. That is normal. A home can have decades of changes, so the most practical choice may be one that respects the architecture and fits the surrounding streetscape.
Check Louisville-Area Requirements Early
Before finalizing exterior colors or repair methods, determine whether the property is in a local historic district or subject to neighborhood restrictions. Contact the appropriate planning, preservation, or homeowners association office and ask whether repainting, material replacement, porch repairs, or siding work needs approval. A simple repaint may be treated differently from replacing trim, changing siding, or modifying a visible exterior feature. Requesting clarification in writing can prevent a project from stalling after materials are ordered or work has begun.
Inspect the Surface Before Planning the Finish
Paint failure is often a symptom rather than the main problem. Louisville’s changing seasons can expose weaknesses around rooflines, porches, window sills, and joints where water collects. Walk around the house and look for peeling, cracking, blistering, chalking, mildew, failing caulk, loose boards, soft wood, rust, and water stains.
Address Repairs Before Cosmetics
Do not paint over rot, active leaks, open joints, or loose coatings. Repair damaged wood, correct drainage or gutter issues, stabilize loose materials, and allow damp surfaces to dry before preparation begins. A repair-first sequence helps new paint adhere properly and avoids hiding a problem that will return.
Make Lead Safety a Non-Negotiable Step
Homes built before 1978 may contain lead-based paint. Sanding, scraping, cutting, demolition, or other work that disturbs old coatings can create lead dust. The EPA’s renovation, repair, and painting program explains the lead-safe practices and certification requirements that may apply to paid renovation work in pre-1978 housing.
- Ask whether the existing paint has been tested before disruptive work starts.
- Avoid dry sanding and unsafe paint-removal techniques.
- Keep children, pets, and pregnant people away from active work areas.
- Use containment, careful cleanup, and appropriate waste handling.
- Confirm that a hired contractor understands lead-safe work practices.
Match Materials to the Building
Compatibility matters as much as product quality. Wood siding, old plaster, metal railings, masonry, and decorative elements, each, caulk, and finish-coat systems. Masonry should not be painted automatically, particularly if a coating could trap moisture or if the surface was intended to remain unpainted. For historic woodwork, a cautious approach is especially important. The National Park Service preservation guidance addresses exterior paint problems. It recognizes that limited preparation can be preferable to aggressive removal when older wood and paint layers are sound enough to retain.
Build a Repair-First Work Plan
- Photograph the home and document existing details, damage, and color locations.
- Inspect for moisture intrusion, loose materials, failed caulk, and deteriorated wood or masonry.
- Arrange lead testing or lead-safe planning when appropriate.
- Complete carpentry, plaster, masonry, and drainage repairs.
- Clean surfaces and remove only loose or failing coatings using safe methods.
- Protect landscaping, windows, patios, fixtures, and adjacent surfaces.
- Prime repaired or bare areas with a compatible product.
- Apply finish coats according to the manufacturer’s instructions and suitable weather conditions.
- Inspect after drying, then complete touch-ups and cleanup.
Set a Realistic Budget and Know When to Get Help
Historic-home painting costs can change based on home size, number of stories, access needs, trim complexity, surface preparation, repair scope, lead-safe procedures, and the number of colors. Ask for estimates that separate preparation, repairs, materials, labor, and cleanup. That makes comparisons more meaningful than choosing solely by the lowest total. Professional help is particularly useful when old paint will be disturbed, the property has difficult access, significant siding or trim damage is present, historic-district rules apply, or paint failures continue after previous repainting. A qualified painter should be willing to discuss surface conditions, repair priorities, product compatibility, containment, and the sequence of work.
Protect What Makes the Home Special
A thoughtful paint update protects a historic Louisville home while keeping it attractive and livable. Research the design, inspect before painting, correct moisture and repair issues first, use appropriate materials, and treat lead safety seriously. The process may take longer than a fast repaint, but careful planning helps preserve original character and supports a finish that is better prepared to last.
Conclusion
Painting a historic Louisville home is about more than selecting a new exterior color. A careful project begins with understanding the home’s architecture, inspecting its existing materials, addressing moisture and repair concerns, and researching any applicable preservation requirements. Homeowners should also take lead safety seriously when older coatings may be disturbed, and choose preparation methods and paint products that are compatible with the building. By documenting existing details, completing necessary repairs before painting, and creating a realistic work plan and budget, homeowners can protect both the appearance and condition of an older property. Thoughtful preparation allows a refreshed exterior to complement the home’s character while supporting its continued use for years to come.